|
1 |
|
1 |
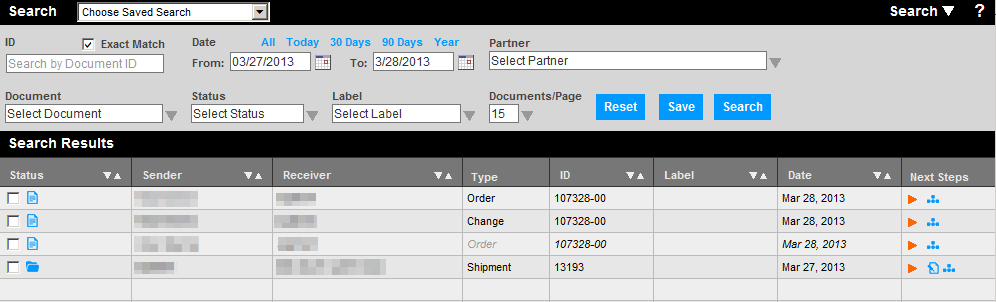
The Search window will display a query (search) window. There are five search options Date, Document, ID, Partner, and Status. You may select one or multiple options for your search criteria.
Learn more about the available search options in this training video.

Click the Search button in the navigation bar at the top of the window to access the Search window.
To search by a specific option place a check-mark the appropriate check-box for the filter or filters to be used.
Search options include:
ID: Enter the ID # of the document (invoice #, PO#). If searching for multiple IDs, separate the IDs using a comma.
NOTE: The Exact Match check-box to search by a specific ID # is checked by default. Uncheck the box if you are using a partial ID.
Date: Enter dates in both the From and the To fields.
All - Click this to clear the date filter and search without any date parameters.
Today - Click this to set the From and To date filters to todays date.
30 Days - Click this to set the From date filter to the past 30 days and the To date filter to today's date.
90 Days - Click this to set the From date filter to 90 days ago and the To date filter to today's date.
Year - Click this to set the From date filter to 1 year ago and the To date filter to today's date.
Partner: Highlight the name of the trading partner in the box.
Document: Highlight (click on) the name of the specific document from those listed in the text box.
Status: Allows you to easily search for documents by their current status on your site - e.g. Flagged, Read, Accepted, etc.
Label: Search by document label. The label field is a user defined field.
Documents/Page: This sets the number of documents per page for the results screen.
NOTE: In the drop-down lists (Document, Partner, and Status) multiple criteria can be selected by using the Ctrl or Shift keys.
Click off the menu or hit the enter key to set the search parameter and clear the menu.
Once the search criteria have been specified, click on the Search button.
Documents that match the search criteria are displayed in the Search Results window as shown below. Click the Search button if you would like to refine your search results or complete another search. The criteria that were selected for the previous search will be retained upon returning to the Search window.
NOTE: To save the search filter settings, see Save Search.
To open the document, click on either the document status icon, the Originator name, Sender, Receiver name, ID, or Date. The document opens for review. You can close the document and return to the Searchbox or Search windows. You can also leave the document open and return to the Searchbox or Search windows to locate other documents. Multiple documents can be opened during the same login.
At the bottom of the Search window is the Select All Results checkbox. This box allows you to Select an Action for results on all pages. Learn more about the Select an Action menu in this training video.

Use the blue icons to perform the following actions:
![]() Print the selected document(s)
Print the selected document(s)
 Print labels and warehouse documents
 Flag the selected document(s)
 Archive the selected document(s)
![]() Accept a PO Change
Accept a PO Change
 Mark the selected document(s) as read
NOTE: There are some limitations on the number of documents that any Action may perform. If you attempt an action on a document that exceeds the limit, you will receive an error message.
|
Action |
Limit |
|
Print Documents |
200 |
|
Print Labels and Warehouse Documents |
200 |
|
Reply |
200 |
|
Forward |
200 |
|
Download Documents |
200 |
|
Auto-Complete |
2,000 |
|
Auto-Complete (One Per Source) |
2,000 |
|
Mark Read |
3,000 |
|
Accept |
3,000 |
|
Open |
3,000 |
|
Close |
3,000 |
|
Flag |
3,000 |
|
Un-Flag |
3,000 |
|
Track UPS Shipments |
3,000 |
Saved Searches are saved, filtered view of WebForms documents that automatically update as documents are added or modified to meet the search criteria. Dynamic Folders are saved searches that appear on the WebForms sidebar for quick access. See Preferences to manage saved searches and dynamic folders.
NOTE: When the To: date is set to the current day, saved searches will automatically update the To: date to the current day for future searches. For example, a search for From: 1/1/XX To: [Current day] will always roll to 1/1 to the current date. Any other date range will remain fixed.
Click on Save to save the current search parameters for future searches.

The Save Search window will appear.
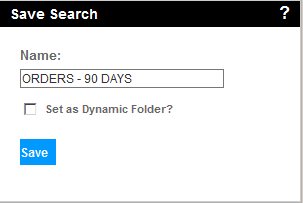
Type the name of the search in the Name field.
To enable this search on the sidebar, click the Set as Dynamic Folder box.
Click Save.
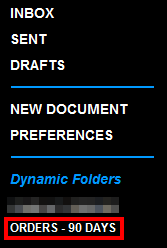
The saved search now appears on the sidebar.
To edit saved searches, open Preferences.
To Access saved searches:
Saved searches are available in the Choose Saved Seaches drop-down menu in the Search window.
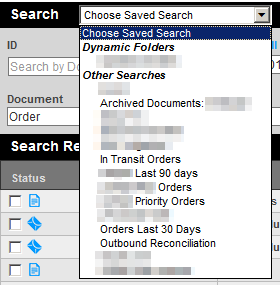
Saved searches may also be set as Dynamic Folders, which may be accessed anywhere within WebForms, by clicking on the search in the sidebar.
Unarchiving a document moves a document back to your inbox.
Select the document(s) to unarchive.
Click the Select an Action drop-down menu. Select Unarchive. Learn more about the Select an Action menu in this training video.
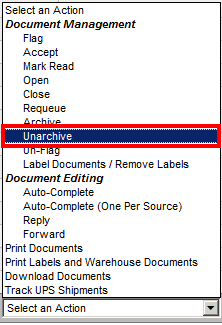
The document is now in your inbox.